


I needed flyers. In order to do programs for my community, I needed to be able to make nice flyers to hang up, hand out, and embed in an email. We could not pay the $75 or more for each flyer to be designed. So I wondered, “What should I do?”
Rabbi Michoel Green wrote an article (see here) on NLEResources.com about Canva where you can make flyers! You can layer words, and you can change font size and color.
They have great tools and you can buy a picture for just $1.00 (or $10 for 11 pictures over time) if you don’t find the one you need for free. Plus you can upload your logo, google picture, pictures you take and so much! I tried it and it is easy to work with.
The more you play around with it, the more you see how much variation it allows. They even have ready-made flyers for you to just fix as you like. You have to sign in and make yourself an account to save all your flyers. You can even use them for pictures, to iron on, or as labels.
Here’s a step by step picture tutorial on an example of making a flyer on canva. Remember there is a lot more variation available!
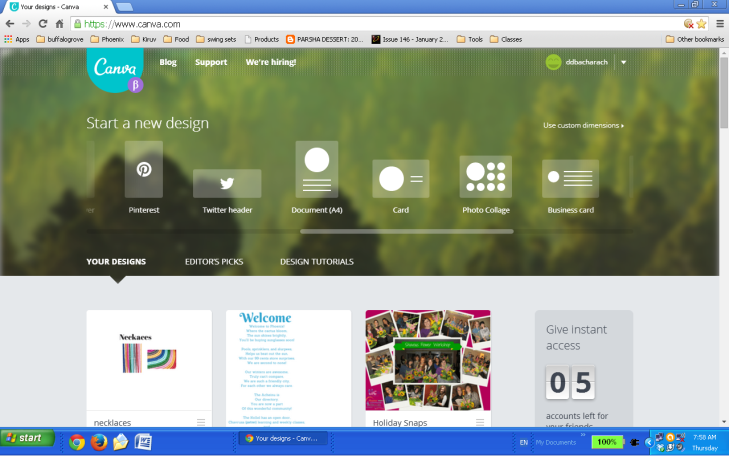
Step 1: Start a New Design
There are a lot of options of formats to choose from to make your flyer. They even have a Facebook template. I like the Document A4 for a regular vertical flyer look. I like Photo Collage for a horizontal look and for emails because it fills up the whole page. Click on the template you want.
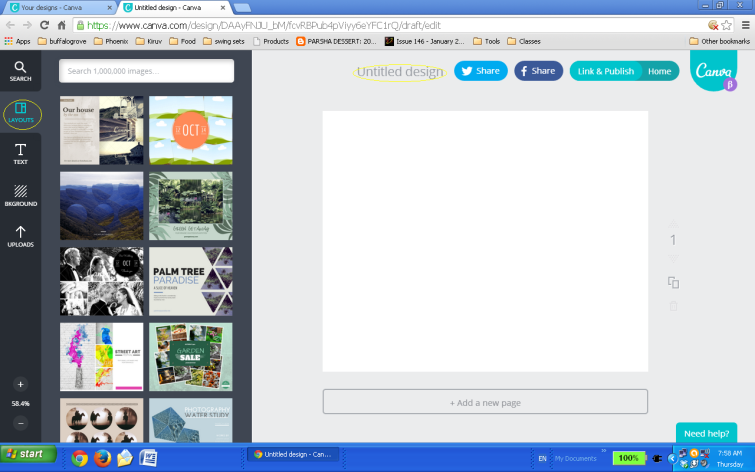
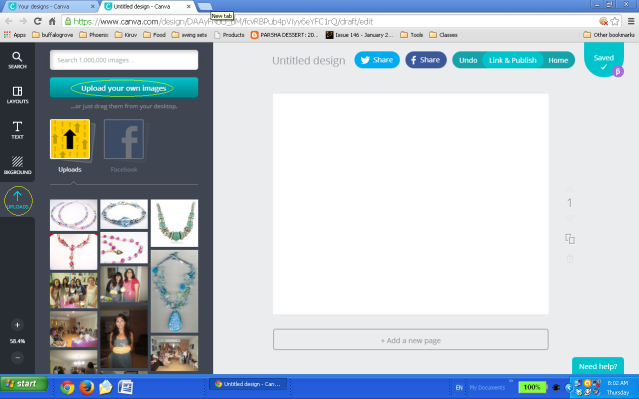
Step 2: Blank Page
I chose Photo collage. By Untitled Designs, name your flyer. Notice the black tool bar on the left: Search, Layout, Text, Background, and Uploads. These are the tools you will use to make your flyer. On the layout tool, see the options of pre-made layouts right next to the tool bar.
Step 3: Upload
On the upload tool, click on “upload your own images.” I uploaded our logo and different jewelry pictures to work with. (Other pictures that I uploaded from previous flyers are still on there as well).
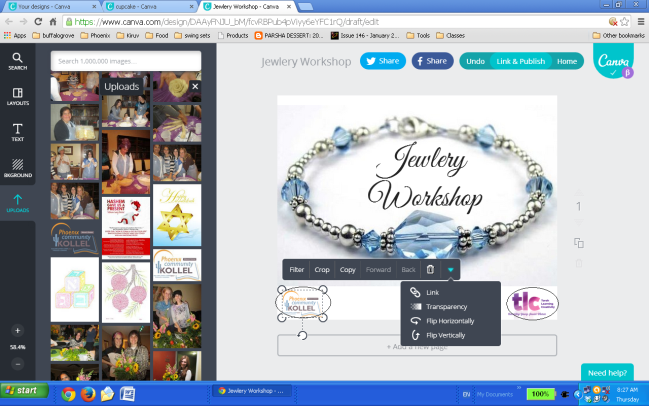
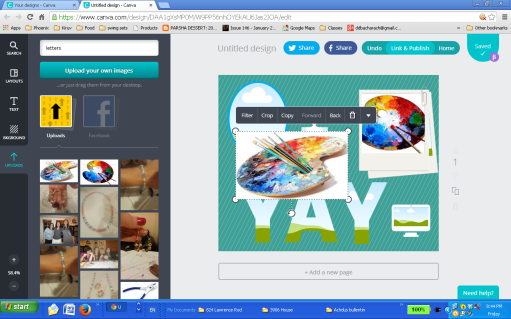
Step 3A: Uploaded
I dragged the picture from the uploads to the blank page. I put in our logo and our picture. You can crop, copy and more with the tool bar for the pictures you put in your document.
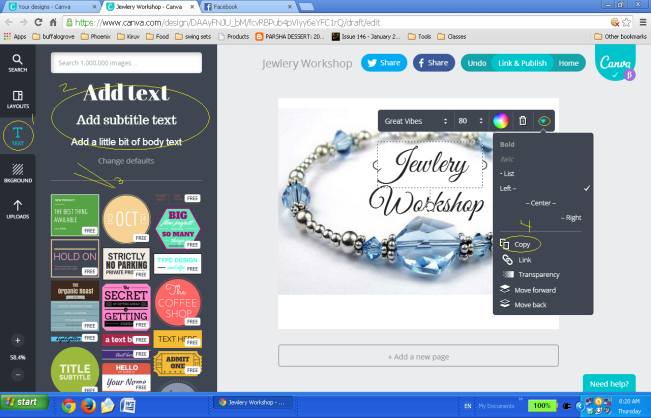
Step 4: Text Time
On the text tool (1), you can pick plain text (2) or text with backgrounds (3). Once you pick your text, you can change the font, size, align and color on the tool bars of the texts. You can write words individually, so you can layer them and choose where you want them placed. You can copy the text box so it is set with the same format and just write the new words.
Step 4A: Lots of Text
Notice the Variety in font, size, location, color.
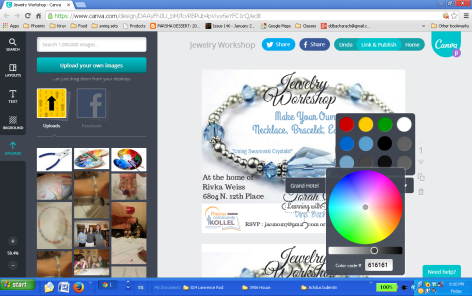
Step 4B: Text and Color
When choosing a color for your text, you can pick from the options provided or you can pick your own shade by moving your pointer around on the circle of colors and picking the darkness or lightness with it.
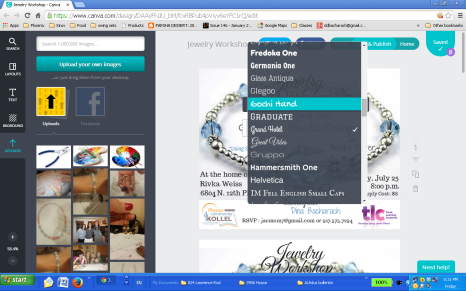
Step 4C: Font for your Text
Notice how many options you have. The screen shot shows only a partial list.
Step 5: Copying a document
If you would like to keep your document as is but have a few changes for other purposes, you can copy your document and then on the new copied page, you can make the changes as need. This is a very helpful tool if you want your flyers and emails to have a few different nuances.

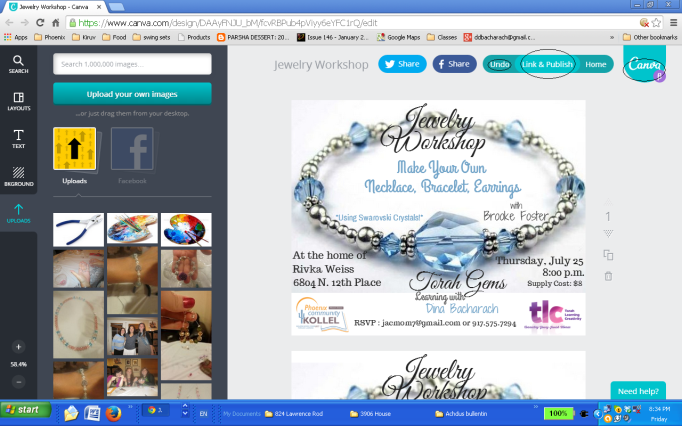
Step 6: Saving!
Look on the top bar of the page. Your document is always automatically saved under the word canva. If you need to change something, you can always press the undo button. When you are ready to save your work to your computer, click the “Link & Save” button.
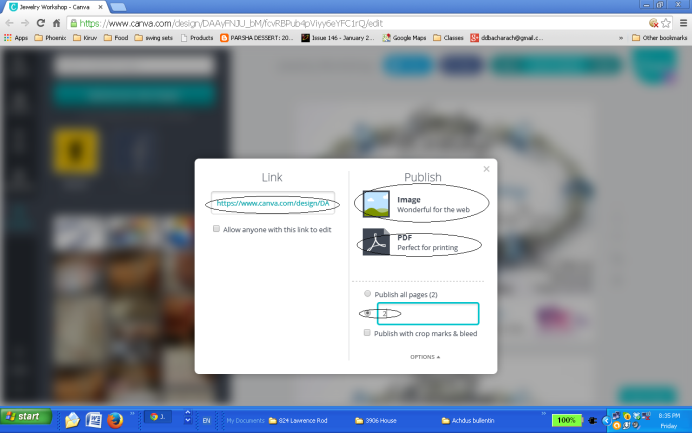
Step 7: Publishing!
After you click “Link & Save,” it gives you two options. One is to link it with a web address. The second is to Publish it either as a png image or a pdf. You can also choose which page to publish. If you do all, you will get a zipped file with all of them in it. Or you can save each page individually by writing which page you want published. You did it!
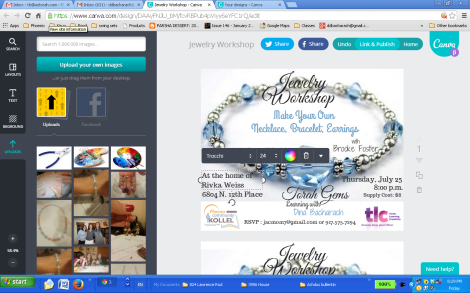
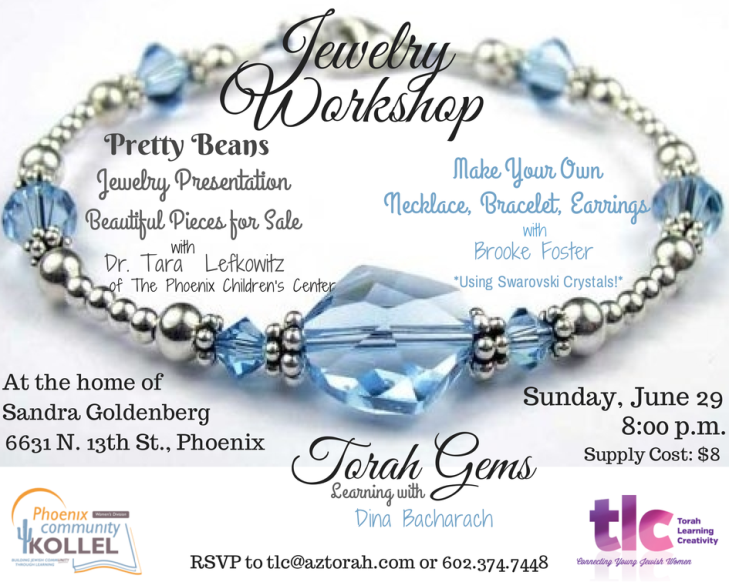
Here’s my completed page:
Step 8: More Options
On the Search tool bar, you have A LOT of options. You can insert different tools into your documents, such as banners, frames, shapes, pictures and symbols.

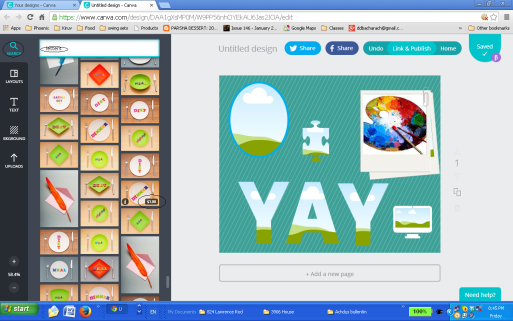
Step 8A: Frames
I clicked on frames. Frames allows you to make a frame to put a picture inside of it. It can be a shape, letters… The symbol of a cloud in the sky and the ground on bottom shows that you can put a picture in that option. You switch to the upload tool and drag a picture of yours on top of the frame and then it automatically goes inside your frame.
Step 8B: Play Around
TThere are a lot of options and great variety. You can search for things. I searched with the word ‘letters’ and it brought up a lot of different things for me to use. Play around and have fun!
I hope this was helpful! Hatzlacha making flyers and more on canva! Please share your ideas of what you made on canva so we can all learn from one another.
Rebbetzin Dina Bacharach is an Elementary School teacher, who holds a Masters Degree in Education, Curriculum and Development from California State University, Bakersfield. Additionally, she is a writer on topics of raising children and personal growth and has been published in many Jewish publications, including, The Jewish Press, Binah Magazine, and Mishpacha Magazine. She is married to Rabbi Don Bacharach, Rosh Kollel of The Phoenix Community Kollel.