


Let’s face it. Any rabbi or educator can tell you just how much work goes into trying to get people to attend his lecture, fundraiser, or community event. There can be a bevy of volunteers and people on your staff who spend a lot of time and effort making sure that the look and copy of the promotional materials is just right. If you are teaching a class you want the source sheets to print clean and crisp—and only after much research on your end, are you certain that you have just the right story that will really make an impact on your audience.
Another important detail to helping ensure that your event is well attended, is the need to show people on your website where your event is going to be held.
Did you know that when you’re organizing an event, you can create a totally customizable Google Map to precisely point your attendees in the right direction?
Keep in mind: This free online tool can also be used to highlight to prospective people looking to move to your community where your kosher pizza shop and local mikvah are located (see here for an example).
Below, we have summarized the directions that first appeared on Mashable.com—so that you can easily make your own custom Google map in as little as eight steps:
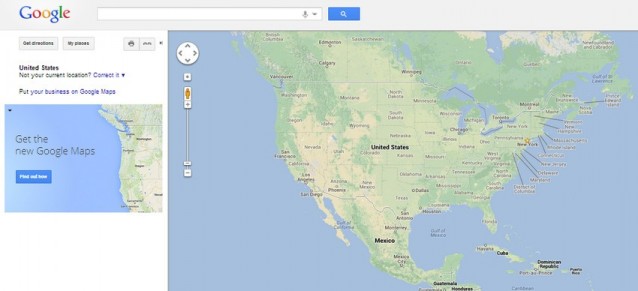
1. Sign into your Google account, head to Google Maps.
2. Click on the “My Places” option at the left of your screen, under the Google logo. Then hit the red “Create Map” button.
3. Give your map a title, such as “Annual Purim Party for Young Israel of _____.” At this juncture, you can also add a description. You will also be able to choose whether you want your map to be visable to the public, or private for just you and who you share it with.
4. Now it’s time to type in the address of where your location. Once the location has been added to the map, you can zoom in for a closer view. Click on the “more” option and choose “zoom here” to get closer to your target destination. When you’re happy the location is correct and you have the right level of “zoomage,” select “Save to map.” This will bring up a drop-down box to choose the map to which you’d like to add the location.
5. This next step is an important one. If you’d like to add multiple locations, doing so is really easy. Simply search for another location, then click “Save to map” and choose your map from the drop-down menu.
6. If you think that your students and congregants are the visual sort, you can easily draw a route on your map. All that you have to do is click on the jagged line icon at the top left of your map while it’s in edit mode.
7. If you’d like to add notes to a location, go into edit mode then click on the blue pin marker icon at the top left of your map and position the pin where you’d like it. You can add notes in the text box. These notes will appear to viewers of the map when they click on the marker icon. You can also add pictures by linking to an image’s URL.
8. Sharing your newly-created map is simple. Click the link icon at the top left of your screen to see your options. You can generate a URL—both full length and shortened—and create HTML code to embed the map.
BONUS: Finally, if you’re creating hard copy invites to an event, you can also print out your map. Click on the printer icon to do so. Once the print preview has generated, you will see the option to add notes.
If you want to know more than the basics, check out the free online course provided by Google called: Mapping with Google. If you are looking for an alternative to this option, you can also try using MyMapList.com, which offers registered users the ability to easily create custom maps and share them for free!
We hope this will help enhance your event or serve as an easy way for you to give people a virtual tour of many of the Jewish places such as the school and shul in your area.